Log into chrome under your student's account
Browse to https://chrome.google.com/webstore
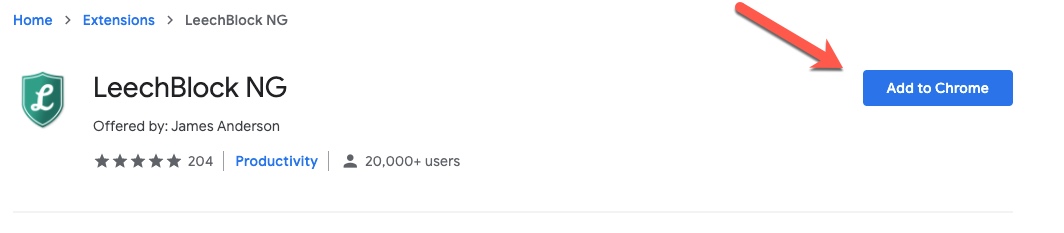
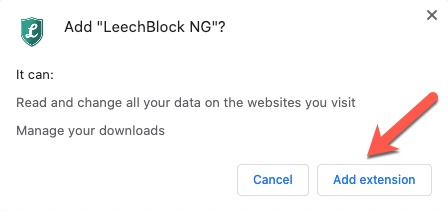
Click on LeechBlock NG in the Chrome Web Store and click the Add to Chrome button, then click Add extension to install the extension to your web browser
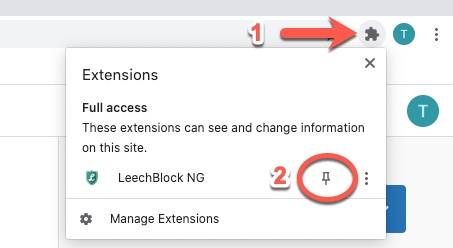
Now that the extension is installed click the puzzle piece icon near the top-right of the window, then click on the thumbtack to easily access the extension
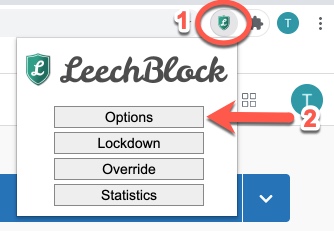
You should now see the Leechblock icon appear next to the puzzle piece icon in the top-right of the screen. Click on the icon and select options to be taken to the extension options
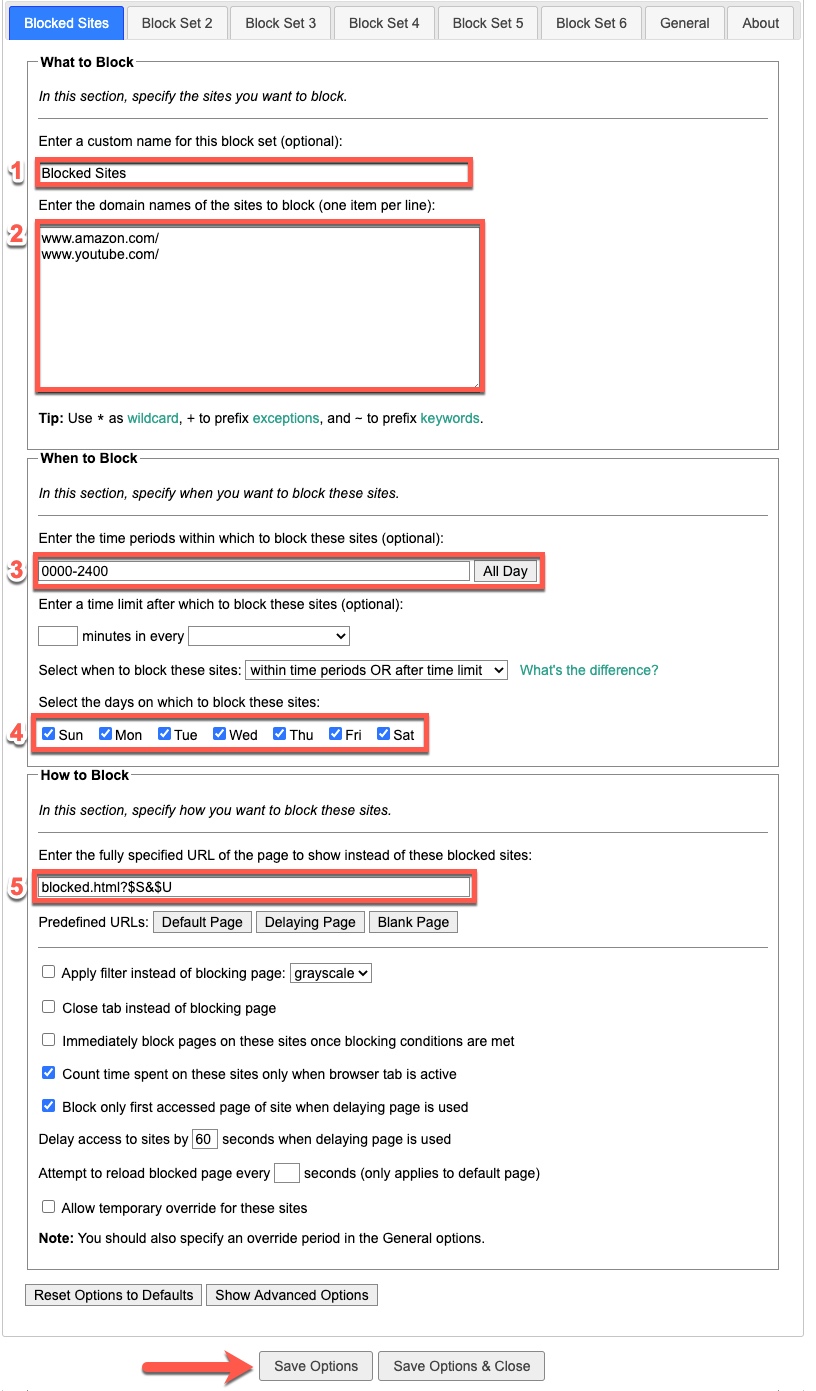
There are a number of settings that can be adjusted on the options screen:
1. Name for the list of blocked websites
2. The URL's copied into this box is the list of websites that will be blocked, make sure you are only pasting one website per line in this list
3. The time you want those websites to be blocked from, you can also click the All Day button to block them for a full 24 hours
4. The days you want the websites to be blocked during
5. The page you want displayed when your child visits a blocked site. We recommend keeping this as the default
Once you have changed the sites and settings to your liking click the Save Options button to save your settings
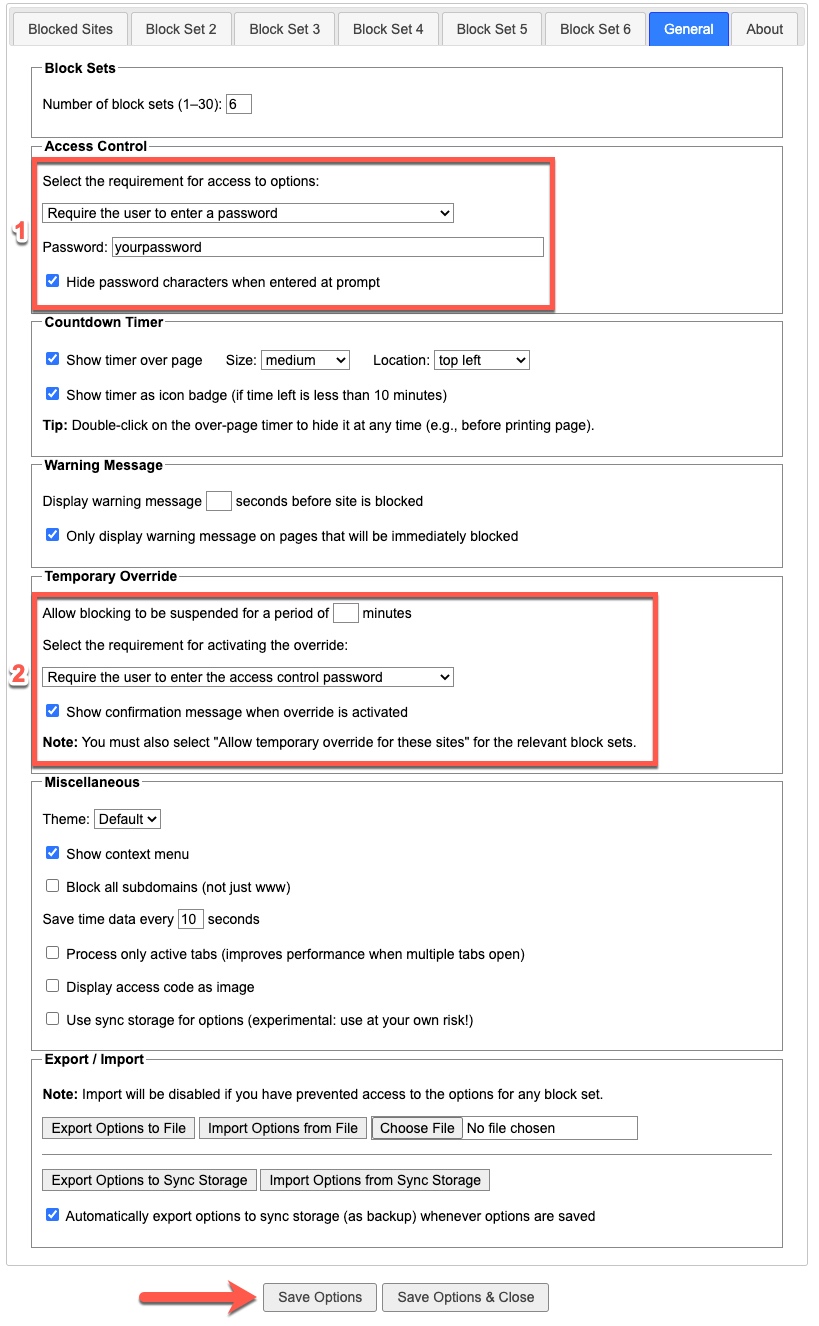
If you would like to enable overrides click on the General tab at the front and configure these options:
1. Select "Require the user to enter a password" from the dropdown options and create the password you would like to use
2. If you would like to allow a temporary override for a website, enter the number of minutes you would like to suspend the blocking for. Then select "Require the user to enter the access control password" from the dropdown, this will use the same password you set during the previous step. You will also need to have the "Allow temporary override for these sites" option allowed in your Blocked Site set.
Click the Save Options button to save your settings
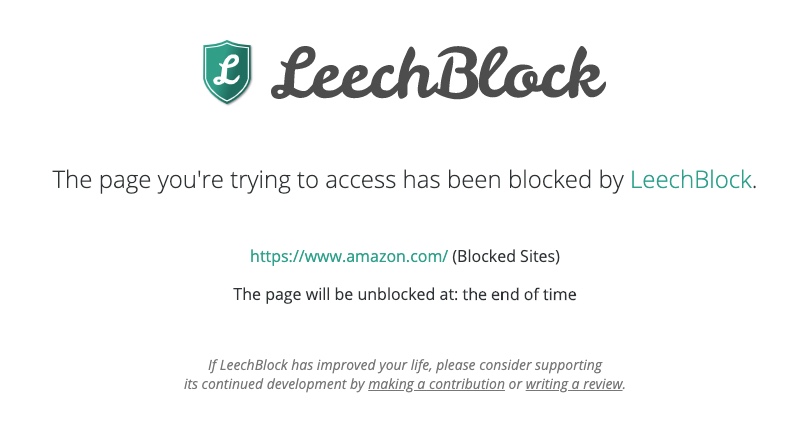
Once you have saved the settings any blocked sites should display the follow page when they are browsed to: